I'm a mama of three doing what I love and fueled by Grace, Mercy, and a whole lot of coffee. I'm so glad you are here!
Hey, friend!
I'm Courtney.
mini brand
brand building
website design
template customization
tell me more
Browse by
category
Move to Manual: Understanding Metering
This is going to be the last tutorial in the Move to Manual Series! Next week, I’m going to go over setting up a shot and how I prepare my settings and position my subject. Next weeks post won’t go up until Tuesday because I want you guys to take a full week to review the tutorials I’ve already shared and get in some practice with metering before piecing everything together (unless you are already, which is GREAT!).
Today I’m going to go over metering. I won’t go too in depth with all of the different metering modes, but do want to explain what each of them are and when you’d be most likely to use them.
I have to admit, understanding how to meter changed my photography a bit. Everything about photography is subject to light and ensuring that your subject is properly exposed is a key factor in creating the difference between a snapshot and a portrait. Light can change every aspect of your image and, even though you can make some changes in post processing, having an image exposed correctly in camera makes everything easier when it comes time to edit an image (whether in Photoshop, Elements or Lightroom).
What exactly is metering?
Metering measures how the camera adjusts to brightness and light in an image. What metering essential does is examine how much light is surrounding your subject and then it decides how to properly expose the subject. This sounds simple enough, but it’s another way that your camera makes the decision for you until you start changing the settings up and telling your camera what to do. Unfortunately, on most SLR cameras, you can’t change the metering mode unless you are shooting in manual.
Let’s take a look at a few of the different metering modes…
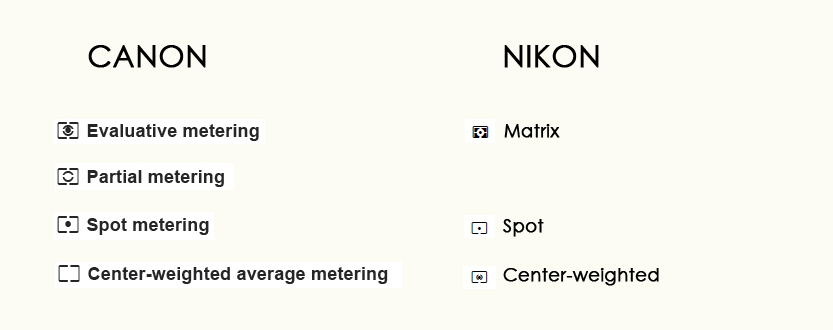
| Source |
Evaluative Metering (Canon)/Evaluative or Matrix Metering (Nikon)
This is usually the default setting on most SLR cameras. It’s one of those “general purpose” settings (like Auto mode) that is designed to give you an all around decent exposure on an entire image. In this mode your camera is going to set the metering mode to expose the entire scene. I use Evaluative Metering when I’m shooting a landscape shot because I know that my camera is going to work to properly expose the entire image, rather than just parts of it. I will say that I have read a lot of posts in various photography forums by professional photographers who use Evaluative Metering when they shoot. Some do, some don’t. It’s one of those things that’s a matter of preference.
Center-Weighted Metering (Canon & Nikon)
This metering mode is exactly what it says…it measures the amount of light in the center of the image (in your viewfinder) and works to expose it properly. I have never used Center Weighted Metering and really don’t much about it other than the basics of what it actually does.
Partial Metering (Canon)
Partial Metering is most effective when you are capturing backlit subjects. By metering off of your subjects face when they are backlit using the Partial/Spot Metering mode, you are better able to ensure that they are exposed properly and their faces can be seen.
Spot Metering (Canon & Nikon)
The only real difference I have found between Partial Metering and Spot Metering is the size of the area that is measured. It generally works the same as Partial Metering does for Canon.
You can find a really great article on the details and technical aspects of metering at Cambridge in Color. These guys really know their lighting and offer some great resources for really understanding how your camera reads light and measures color.
How I Meter an Image
I use Partial or Spot Metering when I am shooting. Truthfully, I have never noticed much of a difference in their abilities of properly exposing the image I’m trying to capture. I didn’t take my camera off of Evaluative Metering until last year when I attended a Photography Workshop and was taught how to effectively meter my images to ensure proper exposure of my subject. I shared the secret with my friend Michelle who swore by it also and says it completely changed the way that she captures her images.
Before I reveal how I meter, I want to show you an image that I took before this workshop so you can see how badly Evaluative Metering was exposing my images.
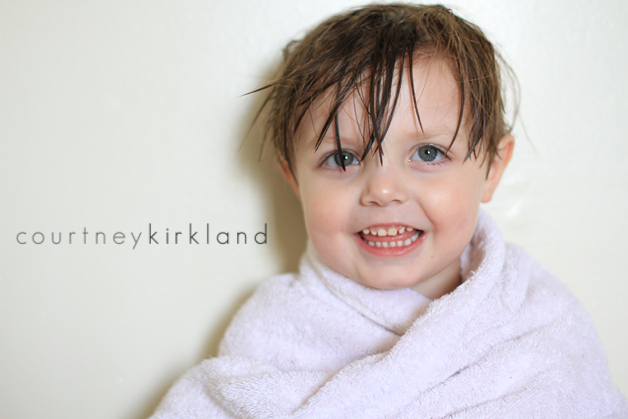
There were other settings I could have adjusted in my shot to have properly exposed this image and compensated for the image being underexposed. But, if I’d been using Partial or Spot Metering and metering my shot off of his skin, I’d have gotten an overall brighter image. Here’s another where I was using Partial Metering and setting my exposure off of his face instead of just letting the camera guess what I wanted exposed:
Hopefully you can see an obvious difference in the exposure of the skin tones in these two images. You wouldn’t think that the second image, shot indoors, would have a better exposure than the image shot outside. But, because of the difference in metering modes, it does.
So how did I do it?
Once I get all of my other settings fixed in camera, I select my focal point. When I’ve decided which focal point works best for the particular image that I’m shooting, I place my focal point on the subjects cheek (whichever cheek is closest to me, usually) and press my shutter button halfway down. This gives the camera the reading of what aspect and what tones in your image you want exposed. Once my camera has it’s metering set, I move my focal point up to the eye of my subject, let the camera focus itself and click.
Sometimes, especially when I’m taking pictures of Noah, my metering is off a bit. It happens and there really isn’t any way to prevent it (unless you’re photographing someone who won’t move). For a long time, I really thought that metering was a complex and overly complicated aspect of photography that I would never understand. But, in all actuality, it’s pretty basic. It’s just you telling your camera what part of your image you want to expose. You can do this with anything: sunsets to create silhouettes, backlit photos to create gorgeous haze…when you understand and grasp how to use metering effectively, the options are pretty much endless.
Your only “homework” for this week is to practice with the difference metering modes! See if you can nail Spot/Partial metering and see what difference it makes in your portraits.
Leave a Reply Cancel reply
Truly easy-to-customize websites for those who need a polished look with a quick turnaround.
Learn More ↦
Shop premade designs
Draw in potential customers with a seamless web experience and SEO optimized site pages.
Learn More ↦
website design
Discover your creative voice with a unique logo development & coordinating brand collateral.
Learn More ↦
brand building
A seamless single logo brand identity experience for those with a clear vision.
Learn More ↦


Let me get this straight..you have your settings already done in camera and then you meter? Do you then change your settings to what the exposure indicator is telling you is properly exposed or is metering automatic? I try to make sure the exposure comp bar is set to almost 0.
I think I’ve been using EVALUATIVE (the default) but I am seriously gonna make the change! Everything looks like it comes out so much better 🙂 Thanks for posting this, you have opened my eyes to a new way of thinking!
[…] is; how shutter speed, iso and white balance can change your photos, and we’ve talked about metering. Now…it’s time to put it all together and start shooting in […]
Hi Courtney, great series! Thanks for the tutorials. Just a question: Maybe this is obvious to everyone except me, but when you initially point your camera at your subject’s cheek and press half way to meter, does the camera forget the metering when you then move the camera to the subject’s eye, press, and click? Is there a metering lock to prevent it from changing when you re-focus the shot? Thanks!
This is Great! You have highlighted the features of Canon and Nikon. I have learned a lot on how to do metering. I hope I get the best shots!
These lessons have been great. Will you be leaving these on your blog forever? Just like to have notes to refer back to.
Metering is one of the last frontiers in my quest to learn how to take better photos. I will pay more attention to how I meter and thanks for telling us HOW to meter.
was that friend me????!!! 🙂 because i love that you shared that with me!
Haha! It was! 🙂 You were the first person (besides me) who said they could see huge differences in their images right away after changing their metering mode.